Quickbooks Bank Feed Download Did Not Complete

This tutorial will cover how to transfer funds between bank accounts in QuickBooks Online. We'll show you how to record the transfer and then review or edit the transfer of funds in the bank account check register. Finally, we'll discuss a faster way to record the transfer if the bank account is connected to QuickBooks Online.
We appreciate you completing this free tutorial for QuickBooks Online, our best overall pick for small business accounting software. It's best to follow along in your own QuickBooks account. If you don't already subscribe to QuickBooks, you can choose from a 30-day free trial or 50% off for three months.
Visit QuickBooks Online
This tutorial is one in our series of Free QuickBooks Tutorials. The video below and the step-by-step illustrated instructions that follow present the same information.
Why It Is Important to Transfer Funds Between Bank Accounts in QuickBooks Online
Companies often have multiple bank accounts. For instance, a company might have one checking account for payroll and another checking account for other activities. It's important to record any fund transfers between the checking accounts so that QuickBooks Online has an accurate account balance. Transfers not recorded could lead to inaccurate balances, overdrafts, and even bounced checks.
How to Transfer Funds in QuickBooks Online
1. Open the Transfer Screen
Click on the New button at the top of the left menu bar and select Transfer from the far right column:
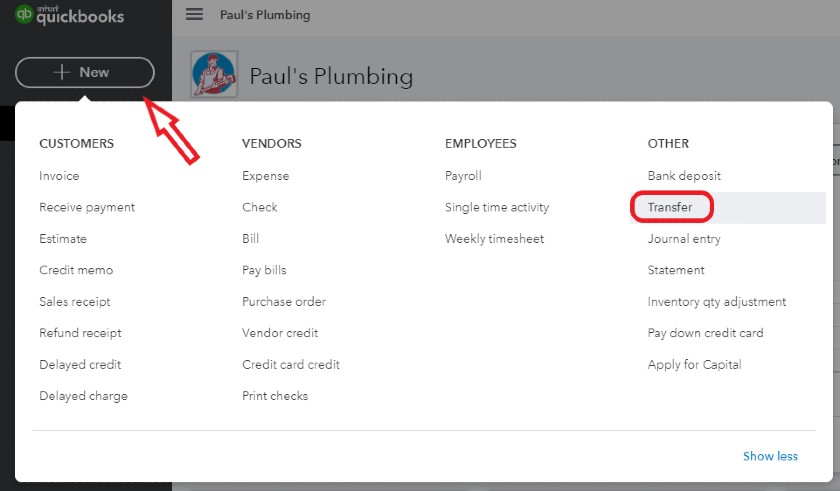
Record an account transfer in QuickBooks Online.
2. Enter the Bank Transfer Information
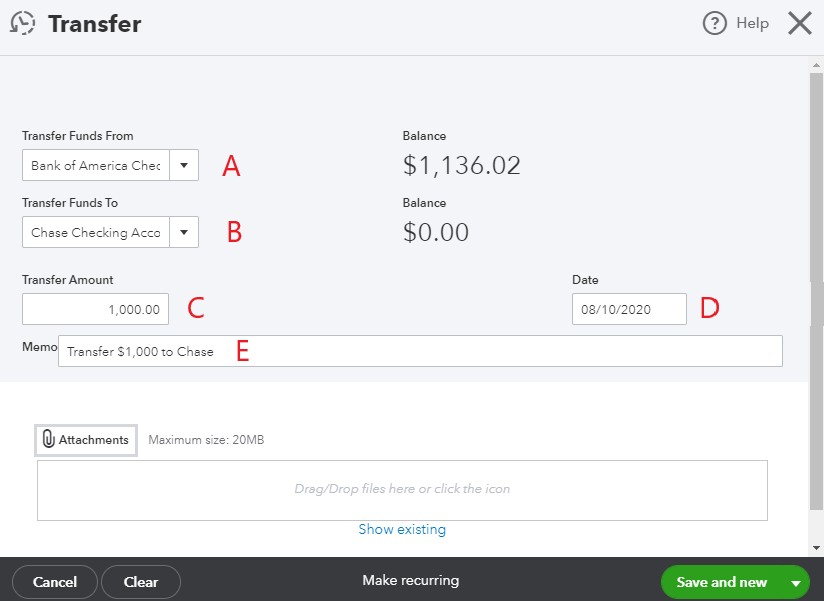
Enter bank transfer information in QuickBooks Online.
A. Transfer funds from: Select the bank account from which the funds will be withdrawn. The balance in the account selected will be shown to the right of the account. Make sure you have enough funds in the account to cover the transfer.
B. Transfer funds to: Select the bank account where the funds will be deposited. If this is a new bank account, select Add New to create a new account as shown in How to Set Up the Chart of Accounts.
C. Transfer amount: Enter the amount of the transfer.
D. Date: Enter the date the transfer will be recorded by the bank where the funds are being withdrawn.
E. Memo: Provide a brief description of the transfer.
When you are satisfied with the information you entered, click the drop-down box next to Save and new and select Save and close.
Entering the transfer on this screen does not initiate a transfer at your bank, even if the bank account is connected to QuickBooks Online. This screen records the transfer in your books. If both bank accounts are connected to QuickBooks Online, you can skip recording the transfer here and accept the bank transfer uploaded from the bank feed as described in How to Manage Bank Feeds.
How to Review and Edit Bank Transfers
To review and edit a bank transfer, you must first find the transfer in your checking account register.
1. Open the Chart of Accounts
To find the checking account register, hover over Accounting in the left menu bar and then click Chart of Accounts:
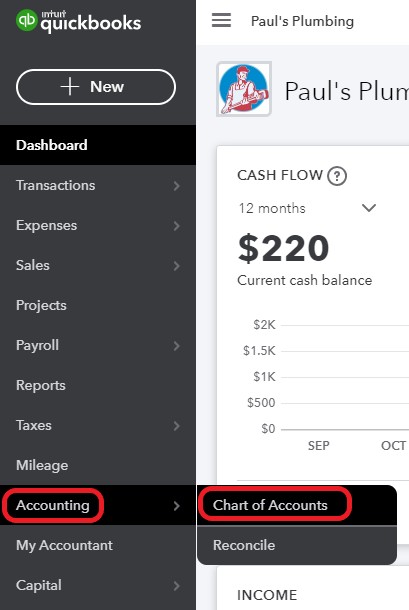
Navigate to Chart of Accounts in QuickBooks Online.
2. View the Check Register
In the Chart of Accounts, find the bank account where funds were deposited and select View register in the far right column. If you prefer, you can view the register of the bank account from which the funds were withdrawn:
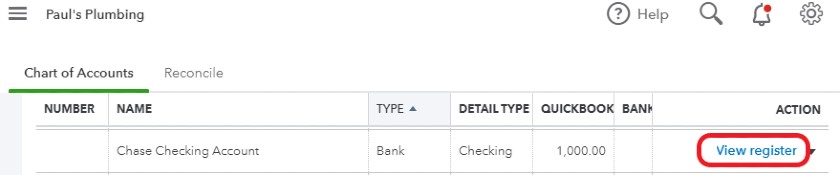
View the check register in QuickBooks Online.
3. Review and Edit the Transfer
Scroll to the transfer to verify that it has been recorded. By default, the register is sorted by date to make the transfer easy to find. If you need to edit the transfer, click anywhere on the transaction and then click Edit:
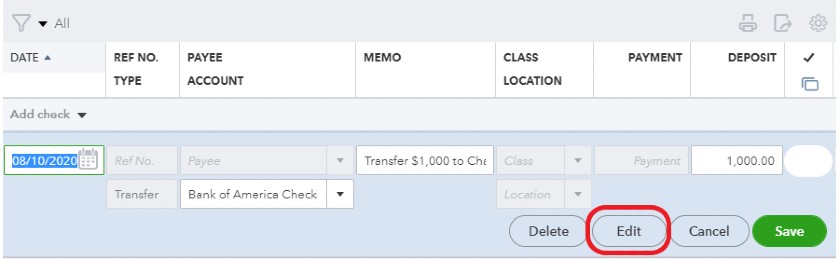
Edit a bank transfer in QuickBooks Online.
Clicking Edit will open the transfer screen where you entered the transfer originally. Make any necessary adjustments and then click Save and close.
Wrap Up
Congratulations on the completion of another QuickBooks Online Training Course. You've learned how to record, review, and edit bank transfers within QuickBooks Online. The next tutorial in our QuickBooks Online Training Course is How to Record a Bounced Check in QuickBooks Online. That tutorial will teach you how to reverse the deposit of a customer's bad check, restore the accounts receivable from the customer, and record any associated bank fee.
Source: https://fitsmallbusiness.com/transfer-funds-between-bank-accounts/
Posted by: staceepontiff.blogspot.com